Showing posts with label blacksmith. Show all posts

Saturday, October 26, 2024

The grind is done

This is the final result. I think it is pretty nice, it feels like it is melting in the hedge. 
Our window carpenter thought that red was nice as it was fitting with the windows, but I think this will match the windows metal one day and it feels more connected to the garden.

The final result
After painting it with järnmonja I had to paint a couple of layers of green. Having a red base is usually good with green as the green becomes deeper, as a final result.

From another point of view
It is also not super easy to cover though and, to be honest, painting the grind was not very easy either. One wants to avoid to clog the paint in the curlycues, as it looks horrible, like raisins skin, when one uses linseed paint, ot to have it too light - and it is not easy to see under all the whirls. 
The result is that of course, after I was "done", I noticed few spots were I didn't really cover the metal or the red paint properly.

Shining pine cone

Curlycues after one layer of green


Tuesday, September 10, 2024

The little grind

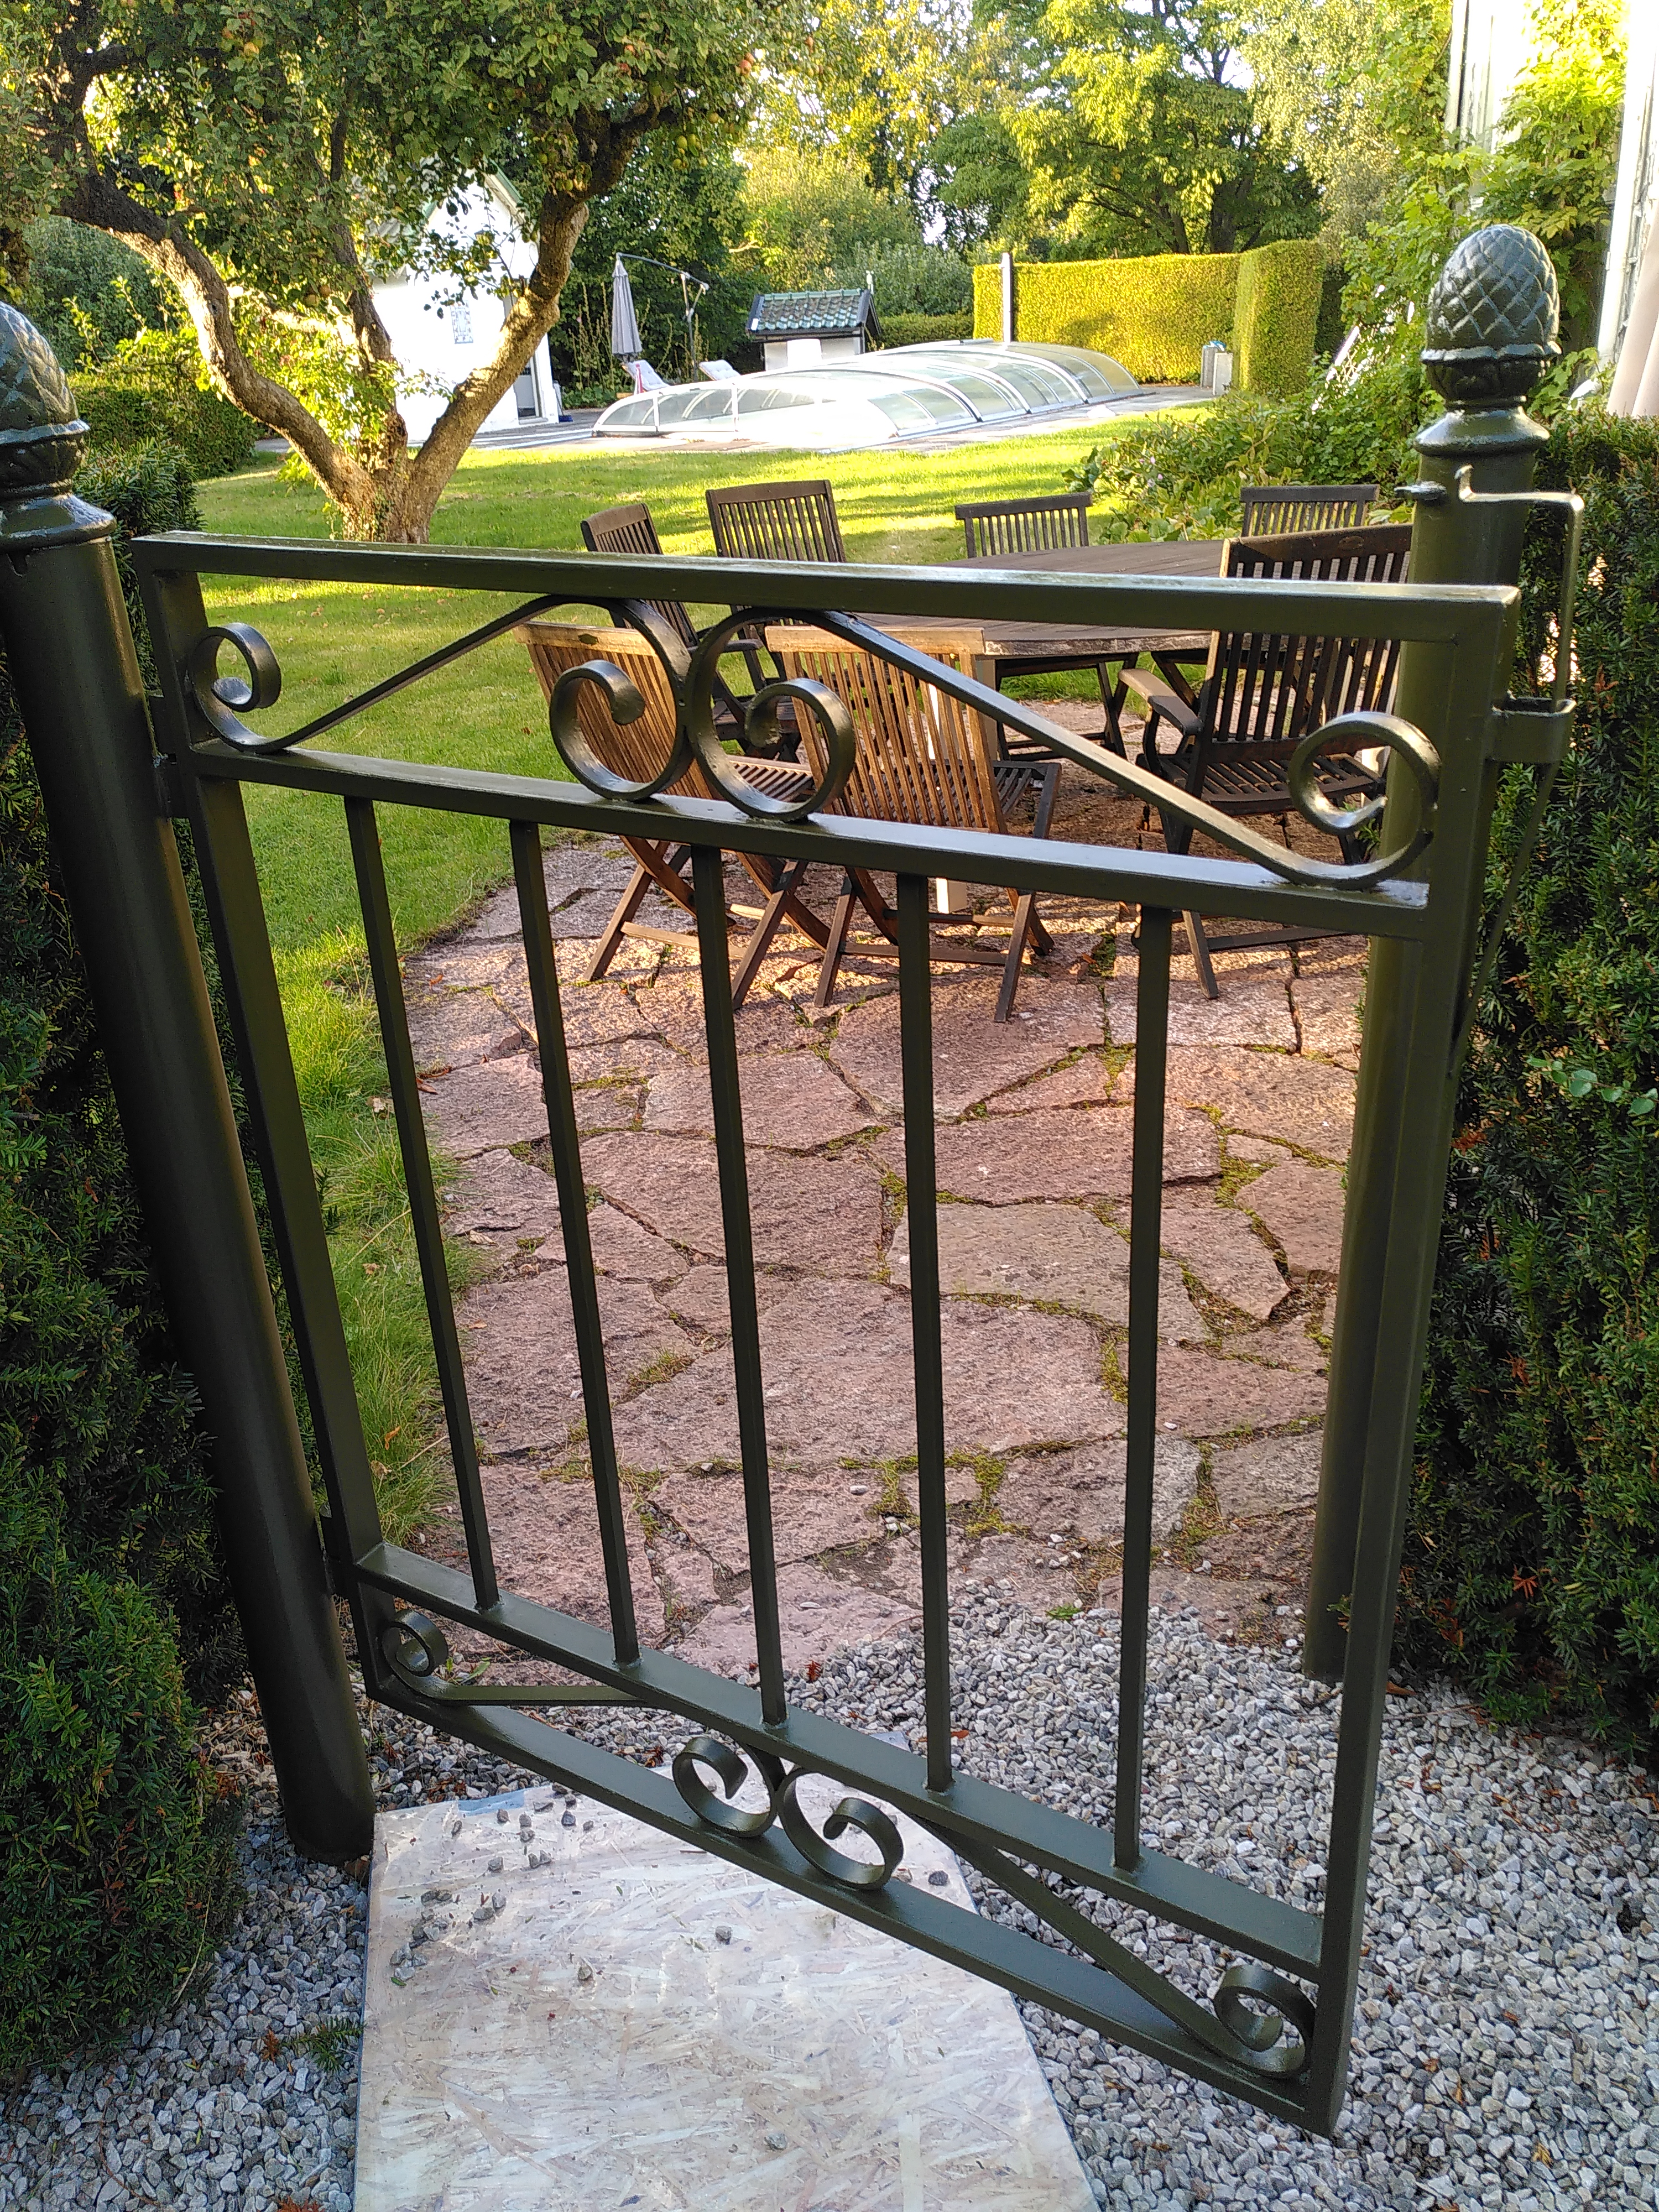
 We have a little grind, between where we park the cars and we could sit having dinner. Something that probably the owner just before us installed in the garden. 

Last year, we found one of the decorative pine cones on the ground and we realized it was very much high time to fix this little grind. 

I can't right now find the picture of how it looked then. Nevertheless, the blacksmith came and took the grind with him. He told us to try to sand the pillars and fix them up, thing that we didn't really exactly managed to do. Time but also skills have been an issue. 

The gate is back and the pillars are sanded
This august we finally got back the grind. I then begged the blacksmith to try to help us with the pillars and he did something with one of them, after reinstalling the pine cone on it. 

The pine cone
I had very much hurry then to at least apply a first layer of paint with some protective rust paint (järnmönja) but of course, the weather was not on my side: rain was forecasted.
I went in the evening out and with the head lamp on I applied, as best as I could, the first layer of paint. We then left the sun umbrella open, hoping it would not blow away, for avoiding the rain to just destroy everything I had done. 

It actually worked!

Wednesday, April 29, 2020

Finally, shadow

The project of having curtains in the tv and music room has taken a bit of time. As all the projects, it starts with a need and an idea, for then developing in a mass of small details that need to be synchronized and fixed.
The curtains, few minutes after we had installed them, with a beautiful sprint light shining through them
We have had the curtain rod up on the wall for a while - sadly too long. We needed the blacksmith to come back to shorten it the necessary.
And although the William Morris side curtains have been ready since the autumn, I couldn't ever win an auction with proper and sufficient rings and clamps to hang them with and, considering how smooth it is to put up and down the big curved rod, I wanted to wait also for the white curtains.

The curtains behind the piano
We are still not completely "done". We managed to accelerate the process around the tie backs, by purchasing the screws that will be used for mounting. But this step will take (I know) few months if I won't pressure for making it happen.

Evening light
Apart from that, it is clear that I need to spend more time on some auction to try to get more rings with similar clamps. Let's hope it won't take too much.

The smaller window
Additionally, for the white curtains in the center of the tower room, I think it is necessary to possibly get some double tie-back to hold them together. 
I have tried to look around for something like that but failed, hence, slightly embarrassed because we did just joke about my stream of requests, I contacted again the blacksmith for a "own designed" one.
Today it was not very sunny, so we let the light come in
And if I know how it will be, it will take many messages, chats and some patience to get all three missing parts in place - and maybe I should say four, because I have to fix the wall that got scratched during the previous attempt to install/dismount the big curtain rod from its location.

Detail of the ring and clamp


Friday, August 9, 2019

Not a good week

Progresses are currently made by Mattias who is trying to fix a lot of stuff that breaks now or that has been broken forever. 
In all of this, since I am working, I try to come home and hope that the weather is merciful enough for me to pain the pool house or work with the stones behind it.
Of course, I could also paint indoor some parts, but there are also other things I want to do...

We have been having the carpenter showing up, trying to adjust our garage doors, which unfortunately, as they are heavy, have a tendency to tilt slightly.
In a previous attempt, the carpenter had put some washer to tilt back the doors and it did help at the time.
We had asked the blacksmith to fix some metal bars to apply on the back of the doors, to stabilize. The carpenter's hope was that that would also tilt them back, but that of course didn't happen.

The metal bars are mounted on the doors
Mattias managed also to put the handle buckler but we had some issues with the one for the key, as the holes are too big and the buckler wouldn't be attached to anything.
The mismatch with the key buckler

The garage doors. When looking at them one can see the uneven gaps due to the tilting
In an imperceptible manner, I have now geared up a bit towards the pool house painting. The main problem is that when I have the time, the weather is unstable. If I can't paint, it is sunny and shiny.
It is also imperceptible because first I have been oiling everything and now I am putting the first base layer, which though is almost on the transparent look.
This is under the roof. Do you see any form of painting?
Maybe seen from the other direction?
When preparing for the base painting an accident happen. I misplaced a paint jar on the edge of the table, thinking it was longer than it was in reality and the opened jar fell straight upside down.
I used kitchen tool toys for picking up as much paint as I could.
I have almost picked up all the paint here
That was not the only accident of the week. 
I had noticed that one of the downpipes around the veranda was hanging a bit too much, due to the vine that is pulling it out.
Well, the other night it was probably a bit more windy than normal and (together with Isabella's sunflower which had been grown beautifully) the downpipe fell on the ground (and the vine too).

The downpipe is waiting to be put back
With the output, of course, of having an additional task to have to fix.


Sunday, June 30, 2019

The rods are up

Summer is here and thanks to some weeks of holidays, there are some progresses in some of them many projects that we start (and barely finish).
Let's give an update about what's happening with the curtain rods in the "red room" (also known as piano or tv room).

We are at the point where the rods are up, I have oiled them and we need to:
1) choose the curtain textile
2) buy all the accessories (rings, tie-backs, ...)
3) have the blacksmith coming here and cut the curved rod, since it is too long
4) fix the wall, as it got scratched (typical...) when the rod was put up

Curved rod, left side

Curved rod, right side
Once all is done, we will also add the quite beautiful knobs.

The knobs at the forge
The wall fasteners became pretty good at the end, but there is a little long history behind them.
The idea was to have some "jugend" inspired design. Something was defined during last summer, but that got lost in time and space.
I spent a quite rushed hour with the blacksmith trying to find something feasible and trying to remember how it was supposed to look, but that didn't work out exactly smoothly.
We came up with an idea, but that was not approved as it was too messy to have done in such a small piece.

A first attempt for the wall fasteners
Considering the space limitations, our blacksmith had to use a bit of creativity and make more trials, before, after a ping pong of pictures on Whatsapp, we gave our approval.
How shall we do this??

There, this should work! And in fact, it did!


Saturday, May 25, 2019

On the way to some curtains

We have an infinite amount of projects and, even though we have been living in the house for 7 years, in a sense, it feels like we have been just moved in.
We lack curtains, carpets, some things are still in a very temporary state.

One of the things that are crucial though are the curtains, not only for the sound, but of course mostly for the light. When the spring come, the longest days can be unforgiving.

The focus has been now the tv/piano room, as it has been impossible to play the piano when the sun has been hitting the room.

Where one of the curtain rods will be. Some of the supports have been already mounted. 
As the room has a circular form, due to the tower, we can't go for an ordinary solution and when thinking if we should have wood or metal, we went for a metal solution. 
The same kind of style will be applied to the curtain on the other window in the room.

The curtain rod
Our blacksmith, after few reminders, started to work on the curtain rod, which has to have the right shape. Sadly, it is not yet perfectly following the wall, so we will have to do some adjustements next time the blacksmith is home.
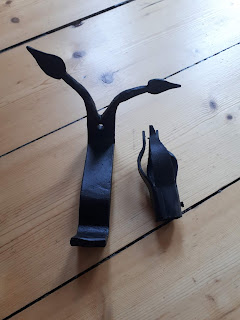

Support for the rod and end of it
There were a lot of discussions about the design of certain details. I thought we had been clear on it during the autumn, but everything couldn't be found, so we had to start from scratch and even though I wanted some other more "jugend" shape, that was the best we could agree upon.

Given the design of the curtain rod, we need to look into the curtains per se'.
And here we have some ideas that are not completely fixed yet.
Possibly 2-3 linen quite plain, as central curtains and then some drapery on the side, with the right kind of textile.
We thought of having something on green, to be a good match with the red of the wall. And from the initial idea, I am more convince that it should look as jugendish as possible, so the samples I have got I think will be discarded.
But I am volitile some things might change.
The first samples for the curtains
Apart putting up the curtain rod to get help in the shape, and decide the textile quality and style, I have also to find something to old the drapery together and rings to have the curtains on.
For the first, I might be asking the blacksmith as well...

Wednesday, September 12, 2018

Being a doctor to the house!

As a owner of an old house, one has to learn to take care of it in the "right way" (especially, in our case, the right way can be a bit complicated).
Now, the most interesting one is related to the garage doors. The garage doors project is a very good example of an eternal one (still details need to be refined, although this summer I spent some time painting minor parts, including the new irons).
The frames are landing on the ground and thanks to that they absorb humidity and they are slightly rotten on the bottom.
Linseed oil injection for the door frame
For taking care of them, a hole have been drilled on the side and I am on a daily base injecting linseed, so that the wood get saturated of it and will not absorb anymore the humidity from the ground. 
I just wonder if I am doing right. The oil comes out of the holes when I am pushing it in (I guess it means I have filled it..) and I wonder how long I am going to do this. The wood has to stop to suck the oil in. 
I am waiting from a notification from the door frame...

Since we are on the garage doors topic, I will follow up on my trip to the blacksmith, which was (finally) fruitful. 
Not only I got fixed a minor detail on a candelabrum, but I eventually got fixed also the handles of the garage door. With how much they cost, I could have probably bought 3-4 of them, second hand, but I thought it was worthy to think that these were the handles that all the owners of our house had held when opening the garage. 
Maybe I should be more cost oriented and less nostalgic?
Internal side of the door
External side of the door

What is missing?
First of all the plates to have around he handle and the key hole.
As we have had the carpenter adjusting the lock plate and adding some rings to the irons, since the doors were not aligned, I have also that minor painting to do.

The final healing procedure is related to the metal in the roof. As we have started the painting project, of course we have got some water leak that has made some nice humidity stain appear just above the piano and has made a minor mess in the tower room.
I am not sure I can state it is a coincidence that we have had someone on the roof and all of a sudden (although he has swore he didn't wash that metal since it looked rusty) we get a water leak, but indipendently of his action the metal is not in the best state ever.
This of course was completely invisible 3 years ago when we did the roof renovation... right!?
For once I will not try to hunt down our roof company, as we have had already plenty of discussions with them at the time of the work.

It is hard to see from the pic, but there are a lot of small holes.

The rubber mass that has been sed for protecting the metal has started to get loose

More on the bad state
Today there will be a plater (plåtslagare) coming by and check this out. I know this is not going to be a smooth operation.
Since he is here, I will also ask him to check the possibility to do the fitting for the eaves for the pool house. We want to have it in aluzink (so it should be easier to paint) but there is not available from the producers. 
I am a bit concerned in having two companies working with the metal there, although it is a minor project and I would prefer to have just one (and the more competent one on the matter).
Let's see...


Just a minor hole in a very peculiar corner, not sure this is a culprit to the water leakage


Wednesday, September 5, 2018

Small projects

Our life in this house is constituted by a lot of ongoing small and big projects. Also the small ones require quite some time to be accomplished (even when we try to focus on exactly that one) for a reason or another.

A perfect example is finding the "right" furniture.
This lamp has been waiting to be found for about 4 years (and by the way, I would have wished to have it with three arms).
We have added some new furniture in the house since I was more active on the blog. Some of them were pieces that we had been longing for for a while.
Lamp from the 40s or 50s
A project that has started two years ago is the outdoor dryer. You can read about this here.
We (well, actually, Mattias), finally started to play around with it and made good progresses.
Next step is to finish the sawing of the decorative part and I have to oil everything.
Mattias is in action preparing for some sawing
Look! His hands are so fast, it is impossible to take a pic (or I simply took a blurred one and I am trying to be funny)

One of the pillars is waiting to be oiled
Considering the people in action and long projects, we have our blacksmith doing a lot of small and big things.
One of them is trying to fix the handle from the garage doors (see here to read how did it broke).
His first attempt was unsuccessful so I went and harass him again.


Preparation...

At work!
Now, tomorrow I need to go and visit him and see if he was really successful this time...


Thursday, November 2, 2017

Closing (almost) the doors

After several weeks of work and wasting a lot of time in other things, we finally got the doors back in their place.
The garage with its doors

Things worked almost fine, with a small exception (of course, as always it generates additional extra work). Since the bottom of the doors got cut off because in bad state and for avoiding to touch the ground, the "holder" doesn't reach the hole in the ground anymore, so the doors do not "stay put", so to speak.
I realize this explanation doesn't help much, but the only thing is that I will invoke the power of the blacksmith to come and see if there is anything smart he can do to fix the problem.
That's how they look inside (yes, temporary handle and still unfinished details)


That is not the only thing missing though. Painting of the metal is still prio 1 and, after putting the doors back, there are some minor patches that need to be painted again (the top of the door frame and the door got scratched initially, because the door was too "uptight", where the doors were leaning there are minor marks of the pieces of textile that were just under, ...) .
Still a lot of work to do... 


The main problem is that the season is not very favorable anymore for painting, although I have challenged the weather in many other occasions with discrete results.
Now, let's see how long more I have to deal with these doors until they can be really considered finished. Because, after all. I still miss the right handle to close them...! Blacksmith, where are you?!!?


Thursday, July 13, 2017

Sliding doors accessory

I am silent here, but it doesn't mean we are sitting on a couch watching a movie, or sitting outside enjoying the birds chirping... I doubt with my ambition I will ever sit down.
Said that, one thing that have disturbed me immensely has been one of the sliding doors. 
We have two pairs, being the two entrances to the "red room", the room where the piano and the Tv are located.
One of them had a nice, steady construction, painted white, so that the doors, when closing, hit that and stay "put".
The other one had a micro piece of wood, that after a while just gave up, fell off and the doors started to float from a side to another when moving.

So, we scraped off what was under the white paint and remove the piece of metal placed there (this we did it actually for another occasion (http://villabellevue1910.blogspot.se/2016/11/sliding-doors.html). I eventually went with it to my favourite blacksmith and with puppy eyes begged him to fix another one.

At the forge...(picture courtesy of Martin Hansson)
The good thing is that he was actually impressed by the piece of metal I had brought with me, and happily recreated another one.
When I went there, I actually brought him a bunch of... crap to fix. So, he managed also to fix some bookshelves holder for a jugend bookshelf we have.
Hand made bookshelf holder
I went though a couple of times back and forth with the "door stop" because the screws that I bought at Byggfabriken didn't tight the metal to the door frame and the first fix was done on the wrong side...
Adjusted so that the screws would tight it
Eventually, we got it properly done, so finally, both sliding doors can be closed properly.

Detail of the door frame

There, where the door stop is!